Aadhaar Card Address Change Online: How to Update Your Address
Aadhaar Card Address Change Online: How to Update Your Address
Your Aadhaar card is one of the most crucial identity proofs in India, used for everything from opening bank accounts to availing government subsidies. But what happens if you move to a new city or change your residence? You need to update your Aadhaar address—and do it right.
The good news? Whether you’re shifting temporarily or permanently, the UIDAI (Unique Identification Authority of India) makes it simple to change your address online and offline, without any hassle.
In this step-by-step guide, we’ll walk you through:
- How to update Aadhaar address online using the official UIDAI portal
- List of accepted documents (POA) for address proof
- Current processing time and status check method
- Common mistakes and how to avoid them
Bonus: We’ll also cover how to update Aadhaar without documents using the Address Validation Letter method.
Whether you’re a student, professional, or senior citizen, this guide will ensure your Aadhaar reflects your current address accurately and legally, without rejected requests or delays.
Let’s get started.
Table of Contents
Why You Should Update Your Aadhaar Address
Keeping your Aadhaar address up to date isn’t just about accuracy—it’s essential for:
1. Accessing Government Services
Many subsidies and schemes (like LPG subsidy, ration cards, pensions, etc.) require your correct address on Aadhaar to verify eligibility and deliver benefits.
2. Banking & Financial Transactions
Banks, NBFCs, insurance providers, and mutual fund platforms often use Aadhaar as a KYC (Know Your Customer) document. A mismatched address can cause issues with:
- Account opening
- Credit card approval
- Loan disbursement
- Demat account setup
3. Receiving Documents & OTP-Linked Deliveries
If you’ve used Aadhaar for postal deliveries or eKYC services, having the correct address ensures smooth verification and delivery of important packages, SIM cards, or bank documents.
4. Filing ITR and Linking PAN-Aadhaar
A mismatch between PAN and Aadhaar data (including address) can delay or reject your Income Tax Return (ITR) or create issues with refund processing.
To update your Aadhaar card, you may check this post: How to Update Aadhaar Card Online (Name, Address, Mobile & More)
Pro Tip: UIDAI recommends updating your Aadhaar address whenever you change residence, even if temporarily.
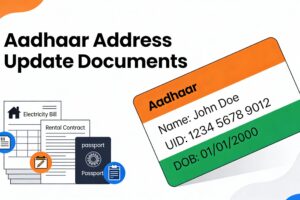
Documents Required for Aadhaar Address Change (POA List)
To successfully update your address in Aadhaar, you need to provide a valid Proof of Address (POA) document. The UIDAI accepts over 40 types of documents for address change, both online and offline.
Commonly Accepted Documents for Address Update:
Here are some of the most frequently used and accepted POA documents:
- Passport
- Bank Statement/Passbook (not older than 3 months)
- Voter ID (EPIC)
- Electricity Bill / Water Bill / Gas Bill (not older than 3 months)
- Ration Card
- Driving License
- Insurance Policy
- Post Office Account Statement
- Property Tax Receipt
- Registered Rent Agreement
- Government-issued photo ID with address
- Letter from a Recognized Educational Institution (for students)
Important: The document must clearly mention your name and the new address you want to update in Aadhaar.
What If You Don’t Have Address Proof in Your Name?
You can still update your Aadhaar using the “Address Validation Letter” method, which allows you to use someone else’s address (like your landlord, spouse, or relative) with their consent. We’ll explain this method in detail later in this article.
How to Change Aadhaar Address Online via UIDAI Portal (Step-by-Step)
The fastest and most convenient way to update your Aadhaar address is online through the official UIDAI website. You can do this from your home in just a few minutes—no need to visit any center if you have a valid proof of address.
Step-by-Step Guide to Update Aadhaar Address Online:
- Visit the official UIDAI website
https://myaadhaar.uidai.gov.in - Click on “Login” under the My Aadhaar section
- Enter your Aadhaar number and click on “Send OTP.”
- Enter the OTP received on your registered mobile number
- Once logged in, click on “Update Aadhaar Online.”
- Choose “Address Update” from the list of update options
- Upload a scanned copy of your valid Proof of Address (POA) document (PDF or JPEG)
- Carefully enter your new address as per the document
- Review the information and click on “Proceed to Update Aadhaar.”
- Pay the nominal fee (₹50 as of 2025) via UPI, debit card, or net banking
- After successful payment, you will get a 14-digit Update Request Number (URN) for tracking
How to Track Aadhaar Address Update Status:
- Go to https://myaadhaar.uidai.gov.in/check-status
- Enter your Aadhaar number and the URN
- You’ll see the real-time status of your update request
Note: The update usually takes 7 to 10 working days, and you’ll receive a confirmation SMS once it’s approved.
How to Update Aadhaar Address Offline via Aadhaar Seva Kendra
If you don’t have access to the internet or prefer to update your Aadhaar address in person, you can do it easily at your nearest Aadhaar Seva Kendra or authorized enrollment center.
This method is especially useful if:
- You’re not tech-savvy
- Your mobile number is not linked to Aadhaar
- You don’t have scanned documents
- You want assistance with the update process
Step-by-Step Guide to Change Address Offline:
- Locate your nearest Aadhaar Seva Kendra
Use the UIDAI locator:https://bhuvan-app3.nrsc.gov.in/aadhaar/ - Book an Appointment (Optional but Recommended)
https://appointments.uidai.gov.in/bookappointment.aspx - Visit the center with your original Proof of Address (POA) document
- Fill out the Aadhaar Update/Correction Form
- Submit your biometrics (fingerprint & photo) for identity verification
- Pay the ₹50 update fee
- Collect the Acknowledgement Slip with your Update Request Number (URN)
What Happens Next?
- Your request will be sent to UIDAI for verification.
- You can track the status online using your URN.
- The update is usually processed within 7–10 working days.
- You’ll get an SMS notification once your address is updated.
Pro Tip: Carry your original documents. Photocopies are not accepted unless verified by the center official.
How to Update Aadhaar Address Without Documents (Using Address Validation Letter)
Don’t have a proof of address in your name? No problem. UIDAI allows you to update your Aadhaar address using the Address Validation Letter method—a convenient option if you’re staying with parents, relatives, spouse, or landlord and they are willing to let you use their address.
How Does It Work?
With this method, the “Address Verifier” (the person who owns the address) provides consent to let you use their Aadhaar-verified address. UIDAI sends a Validation Letter with a Secret Code to that address. You use the code to complete the update.
Step-by-Step Guide to Use the Address Validation Letter:
Part 1: Request Address Validation Letter
- Visit https://myaadhaar.uidai.gov.in
- Login with your Aadhaar and OTP
- Click on “Request for Address Validation Letter.”
- Enter the Aadhaar number of the Address Verifier
- The verifier will receive an OTP on their registered mobile number
- After OTP verification, UIDAI will send the Address Validation Letter by post within 5 working days
Part 2: Update Aadhaar Using Secret Code
- Once the letter is received, login to UIDAI again
- Click on “Update Address via Secret Code”
- Enter the Secret Code mentioned in the letter
- Preview and submit the address update
- Pay ₹50 update fee (online)
- Your Aadhaar will be updated within a few days
Eligibility Criteria:
- Both you and the verifier must have mobile numbers linked to Aadhaar
- The verifier must be willing to give consent
- The verifier’s address should be correct and updated in their Aadhaar
Pro Tip: This method is useful for tenants, students, or homemakers who don’t have a utility bill or bank account in their name.
Important Things to Remember Before Updating Aadhaar Address
Changing your Aadhaar address is a sensitive update, and even a small mistake can lead to delays or rejection. Before you proceed with the update—online, offline, or via validation letter—keep the following things in mind:
Checklist Before Updating:
1. Ensure Mobile Number is Linked to Aadhaar
- All online updates require OTP verification.
- You can link or update your mobile number at any Aadhaar Seva Kendra.
2. Use Valid Proof of Address (POA)
- Your document must match the new address exactly.
- UIDAI accepts over 40+ POA documents, including:
- Passport
- Bank Statement (last 3 months)
- Utility Bills (electricity, water, gas)
- Voter ID
- Driving License
- Passport
- Full list: https://uidai.gov.in/images/commdoc/valid_documents_list.pdf
3. Double-check Spelling and Format
- Make sure all fields—house number, street, locality, PIN code—are entered correctly.
- Avoid using abbreviations or nicknames.
4. Don’t Submit Fake or Edited Documents
- UIDAI conducts manual and automated verifications.
- Any mismatch or forgery can lead to rejection or even legal consequences.
5. Pay Attention to Language
- Aadhaar supports multiple regional languages.
- You can choose your preferred language during the update process.
Tip: Always save the Update Request Number (URN)
This number is essential for tracking your status and can be used as proof if needed later.
How to Download the Updated Aadhaar After Address Change
Once your address update is approved by UIDAI, you can download your updated Aadhaar card instantly from the official website. This updated e-Aadhaar is equally valid as the physical copy and can be used for all purposes.
Steps to Download the Updated Aadhaar:
- Go to https://myaadhaar.uidai.gov.in
- Click on “Download Aadhaar.”
- Log in using your:
- Aadhaar Number, or
- Virtual ID (VID), or
- Enrollment ID (EID)
- Aadhaar Number, or
- Enter the OTP received on your registered mobile number
- Click Download
File Format:
- Your Aadhaar is downloaded in PDF format
- It is password-protected
Password = First 4 letters of your name in CAPITAL + Year of Birth
Example: RAVI1992
Print and Laminate (Optional)
- You can print the e-Aadhaar and get it laminated for long-term use
- Alternatively, you can also order a PVC Aadhaar Card for ₹50
https://myaadhaar.uidai.gov.in/genricPVC
Pro Tip: Always keep a soft copy of your updated Aadhaar in Google Drive or email for emergency access.
Common Reasons Why Aadhaar Address Update Gets Rejected (And How to Fix It)
Many people face rejection while updating their Aadhaar address, especially when doing it online. But don’t worry. Most rejections happen due to simple mistakes that can be avoided if you’re aware.
Top Reasons for Rejection:
1. Invalid or Unacceptable Document
- The uploaded document is not part of UIDAI’s approved list
- The document is blurry, cropped, or scanned poorly
Fix: Use only accepted documents in high resolution (PDF/JPEG). See list here
2. Address Doesn’t Match Document
- Even a small mismatch in house number, spelling, or PIN code can lead to rejection
Fix: Ensure the new address entered exactly matches the one on your document.
3. Document is Expired
- Submitting an outdated or expired utility bill or bank statement
Fix: Use documents that are issued within the last 3 months (for bank statements, utility bills, etc.)
4. Unclear Photo or PDF Upload
- If your uploaded file is too dark, skewed, or illegible
Fix: Use a proper scanner or high-quality mobile app like Adobe Scan or CamScanner to create a clear image/PDF.
5. Wrong Language Input
- Entering the address in English when your Aadhaar is in a regional language, or vice versa
Fix: Use UIDAI’s multilingual keyboard tool during the update process to maintain language consistency.
What Happens If Rejected?
- You’ll receive an SMS stating the rejection reason
- You can reapply after fixing the issue
- No limit on how many times you can reapply
Pro Tip: Don’t ignore the rejection message. Always read it carefully and correct the exact issue before trying again.
Final Tips and FAQs on Aadhaar Address Change
Before we wrap up, here are some practical tips and answers to the most common questions people have about updating their Aadhaar address. These will ensure a smooth and error-free experience.
Smart Tips for Hassle-Free Aadhaar Address Update:
- Always use updated documents (within the last 3 months)
- Keep a screenshot of your Update Request Number (URN)
- Check your status after 2–3 working days at:
https://myaadhaar.uidai.gov.in/check-status - Use official websites only – never share Aadhaar details on unverified sites
Frequently Asked Questions (FAQs)
Can I update my Aadhaar address without a document?
Yes, through the “Address Validation Letter” method, if you don’t have a document but someone you live with does.
How many times can I change my Aadhaar address?
There is no strict limit, but UIDAI may flag frequent changes and ask for additional verification.
Is e-Aadhaar valid for official use?
Absolutely. e-Aadhaar is digitally signed and legally valid for all purposes.
What if my mobile number is not linked to Aadhaar?
You must visit the nearest Aadhaar Seva Kendra to update or link your mobile number before using online services.
Is it safe to update Aadhaar online?
Yes. UIDAI’s portal uses high-level encryption and OTP verification for maximum security.
Final Thoughts on Aadhaar Card Address Change
Changing your Aadhaar address is now easier than ever, thanks to UIDAI’s online services. Just follow the steps, double-check your documents, and keep your URN safe. A correct and updated Aadhaar can save you a lot of trouble while accessing government schemes, banking services, and even job opportunities.
Recommended Reading:
- How to Download Aadhar Card Instantly: A Step-by-Step Guide
- How to Aadhaar Card Update Online in 2026 (Name, Address, Mobile & More)
- Check PAN Aadhaar Link Status (Updated Guide)
- Apply New / Duplicate PAN Card Online from Home in 5 Minutes (Step-by-Step Guide)
- How to Link PAN Card with Aadhaar Card: A Step-by-Step Guide
- How to Download Voter ID Card Online – Full Guide with Official Link
- Order PVC Aadhaar Card Online: Step-by-Step Guide